It takes some work, but you can definitely fit a mountain bike inside a car. Depending on the size of your car and whether it has cargo like a van or it’s a smaller trunk, there are several ways you can fit the mountain bike so you can go enjoy the trails.
Generally speaking, if you drive a mid-size sedan or a SUV, you can likely fit the mountain bike inside with some work and possibly taking the wheels off. I describe this in Method #4 below if it works for you. I recommend putting a tarp down first to keep grease and mud out of your vehicle. If you are going to bring a road bike, likely the tires will be a bit cleaner so this might not be an issue for you. It may even partially depend on if you are biking in the summer or biking in the winter.
If fitting it inside of your car isn’t an option, I have put together 3 other ways to transport your bike that will work on any vehicle. One of these solutions will most definitely work so you can enjoy cycling wherever you please. Just remember not to toss your backpack with your biking gear in next to the bike. Toss it in the passenger seat so you don’t get your energy bars crushed.
There are 4 basic ways to transport a mountain bike with a car.
Method 1: Trunk Mounted Bike Rack

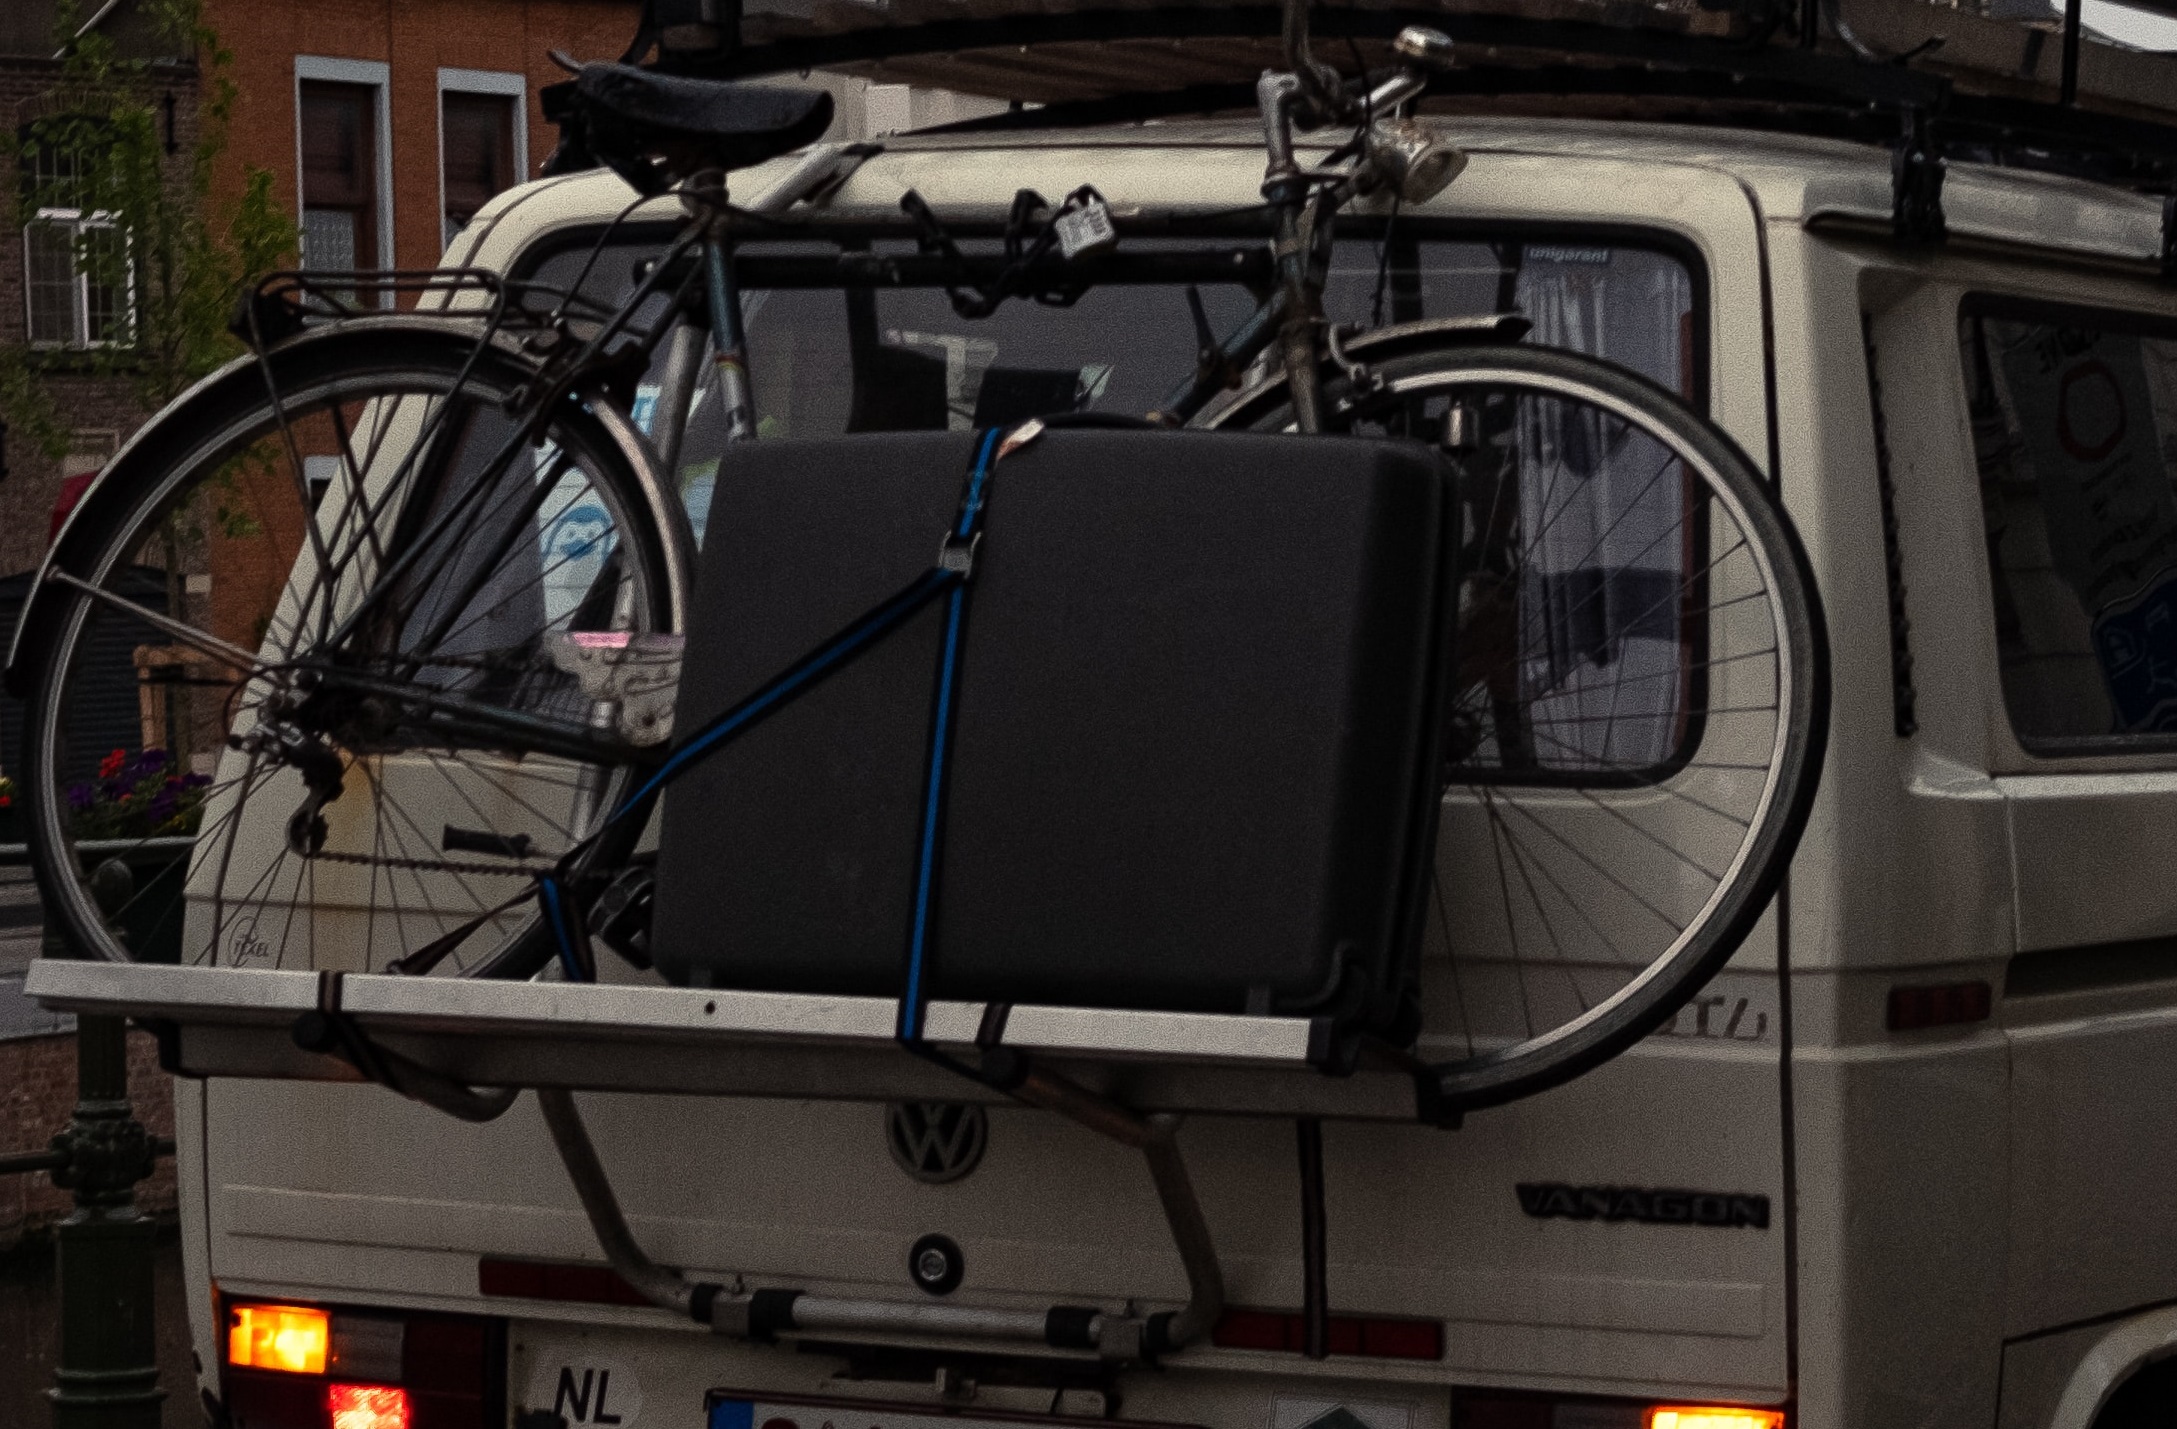
Probably the most common and least expensive options is a trunk mounted bike rack. These racks will fit any car, hatchback, suv, or minivan. They typically have 5 straps and a padded bar to keep the bicycle securely in place.
These only take a minute or so to securely put on and is really 7 steps:
- Unlock the trunk and slightly open it.
- Set the rack on the back of the vehicle and put the two upper hooks just below the windshield around the edge of the trunk. They are typically nylon and safe to use.
- Ensure the lower bar is sitting in the middle of the trunk.
- Hook the left and right nylon hooks to the side of the trunk.
- Hook the bottom nylon hook around the bottom of the trunk.
- Close the trunk
- Tighten up the straps now so it is secure with no looseness.
All you need to do now is put your bike up on the rack and use the velcro staps to secure it.
The beauty of the trunk mount racks is that you can easily move them between vehicles so you’ll have it forever, and they fold up rather small so you can keep it in the trunk itself or in the garage easily.
If you are looking to go the trunk mounted bike rack route, the Allen Sports Deluxe Trunk Mounted Bike Rack on Amazon can be had for under $40 and it is the go-to for quality.
Method 2: Roof Rack
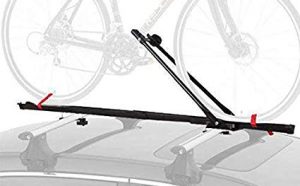
Many car and even more SUVs come with roof racks these days. Typically there are the two bars that cross the vehicle from left to right and on them you can mount skis, a kayak, or in this case, a bike mount.
Bike racks that mount to the roof typically have a flange that goes around the existing roof rails and has a knob you turn to pressure it against the rail and hold it in position.
To mount the bike, you just lift it onto the rail with the wheels still attached and raise the support bar that clamps around the lower frame to hold it upright. Then just wrap the strap around the wheels and you’re off and going. The whole process only takes a few minutes and the roof rack can stay in place all the time if you use it enough.
Because of the way the roof rack mounts, you’ll definitely want a quality one with strong steel to ensure the bike is securely mounted and stable. I personally recommend this roof mount rack from Amazon because not only is it made with solid steel, but the joints overlap so it has twice the strength and it comes with a lock so your bike cannot be stolen. Additionally, it supports the bike with the wheels still on. Some of the racks require you to remove the wheel to mount but this one does not.
Method 3: Bike Hitch Rack
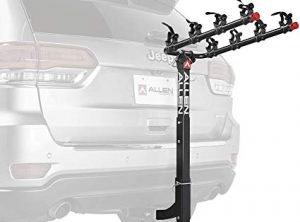
If you are lucky enough to have a tow hitch, I would go with a bike hitch rack before the other options. There are many good reasons why it is the #1 option if you have the choice:
- The bike hitch rack installs in seconds and removes in seconds.
- It can support 4 bikes no problem.
- The bikes don’t have to be disassembled at all.
- The rack can tilt to open the back hatch or trunk
- Get a hitch lock so nobody can remove in this your hitch rack. This one from Amazon is simple and works great. I have a hitch lock on my truck and I highly recommend one.
There are many decent ones, and one of good ones that I know of is the Allen Sports hitch rack on Amazon. Like I recommended another of their products above, they have been around for awhile and they have very high-quality products. This rack has a lock built in so it can’t be disassembled by someone wanting to make off with the rack or your bike.
One thing I have noticed with almost all hitches and hitch racks is that there is a little play which is to be expected given the variance of how hitches are made by lots of different manufacturers. I found on my truck that wrapping electrical tape around it once or twice ensures a snug fit and zero noise as you are going over bumps.
Method 4: Fit Bike Into Car Cargo Area
While my preference is to not take the front wheel off of the bike just to transport it, sometimes that is the best option you have.
- In both cars and SUVs, normally you can fold down the rear row of seats to make more room. That is the starting point for how to do this.
- Remove the wheels of the bike. If you have a taller SUV, you may be able to get away with just removing the front wheel to decrease the length of the bike. The wheels are the largest parts of the bike and without them, the bike frame doesn’t take up much room.
- Put the bike frame (along with brakes and such) into the cargo area of the vehicle. Take care not to crush or damage critical components such as disc brakes or the chain in loading the bike.
- Load the wheels into the cargo area now. With the size of these and with the rubber of the tires, the wheels can both cushion the bike and pack it in there so it doesn’t move much.
When you get to where you are using the mountain bike, just doing the steps in reverse.
Make sure when you put back on the wheels and the mechanicals that everything is tight. Nothing is worse than jumping your bike and having the wheel come off. Make sure your chain is tight too so your gears all work like they should.
Which is My Suggestion?
I myself put the bike hitch as the best method to use. Bikes are very easy to get on and off and it’s easy to take the hitch rack off if needed.
Beyond that, I would use the truck mounted rack if there is no hitch as it’s easier to put the bike on and take it off compared to the roof rack. Putting the bike inside the vehicle is not my go-to but it does work well and you don’t need to buy anything to make it work.
Don’t forget the last method. Make friends with somebody that owns a truck and just toss the bike in the back to go riding.


